Creating a safe and comfortable cage for your parrot isn’t about spending the most money—it’s about understanding your bird’s physical and mental needs. A DIY cage setup gives you full control over quality, customization, and safety. If you’ve ever wondered whether a DIY setup can be done properly and affordably, the answer is yes—provided you plan with purpose and follow practical steps.
1. Understand Your Parrot’s Species-Specific Needs
Before you touch any tools or purchase materials, assess the bird’s size and behavior. A cage for a budgie is very different from one for a macaw.
Key considerations:
- Size requirements: Parrots need space to stretch wings fully. A good rule: wingspan x 2 in all directions.
- Chewing habits: Larger parrots like cockatoos and macaws need tougher materials to prevent breakage or escape.
- Climbing behavior: Conures and caiques love to climb—cage interiors should support that activity.
2. Select the Right Materials (Safety First)
Materials make or break your setup. Many parrots chew on bars and accessories, so toxicity isn’t an option.
Safe materials:
- Stainless steel – Durable, rust-resistant, non-toxic
- Powder-coated steel – Acceptable if bird-safe powder is used
- Untreated pine or hardwood – Best for perches, avoid cedar or redwood
- Zinc-free hardware – Zinc poisoning is a common and avoidable issue
Materials to avoid:
- Galvanized wire (zinc-coated)
- PVC piping that isn’t labeled “bird-safe”
- Treated lumber (often contains arsenic or copper compounds)
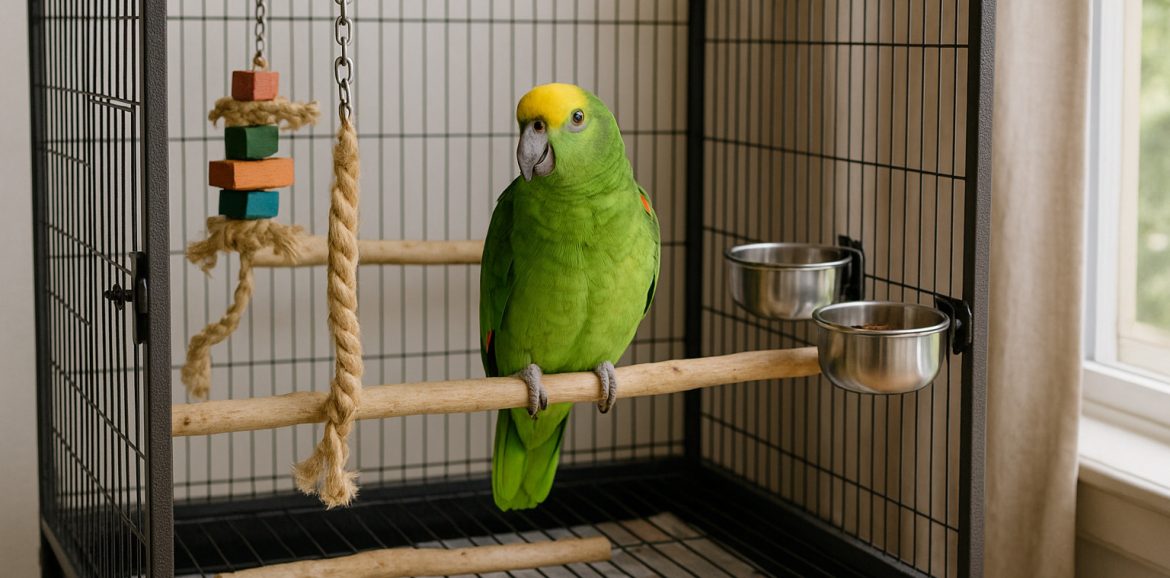
3. Design the Structure with Function in Mind
A cage is more than walls and a door. The design must support mental stimulation, airflow, light, and ease of cleaning.
Must-have features:
- Large front-opening door for easy access
- Removable tray at the bottom for waste collection
- Multiple levels to encourage movement
- Mesh spacing appropriate to the bird’s size (no head slipping)
Bonus ideas:
- Build one wall from plexiglass to create a windbreak for outdoor setups.
- Use a wheeled base for mobility between indoor/outdoor areas.
4. Build the Frame
If using wood as a frame base, reinforce it with steel corners or brackets to withstand climbing and chewing. Pre-drill screw holes to avoid splitting the wood. Measure twice before cutting.
Basic structure instructions:
- Construct a rectangular base from hardwood or powder-coated metal.
- Add vertical support beams to each corner.
- Create the top frame to match the base.
- Wrap galvanized-free mesh across each side, fastening with stainless steel staples or bolts and washers.
Avoid using nails—they loosen over time and present sharp edges.
5. Install Perches with Natural Variety
Perches help parrots exercise their feet. A uniform dowel isn’t enough.
DIY perch options:
- Branches from bird-safe trees (apple, willow, maple)
- Untreated rope wrapped around PVC for variety
- Wooden ladders secured between levels
Mount perches at various heights and angles to mimic tree movement. Leave space above perches to avoid droppings from upper branches falling below.
6. Add Feeding Stations and Water Solutions
Metal bowls that clip into sides are the standard. But you can also create sliding feeding doors to refill without opening the main cage.
Tips:
- Use stainless steel bowls only.
- Position them away from perches to prevent contamination.
- Avoid glass or ceramic—if dropped, they shatter.
Consider adding a small gravity-fed water bottle, especially in summer.
7. Provide Enrichment Without Clutter
Too many toys can cause stress. Too few can lead to boredom. Strike a balance.
DIY toy ideas:
- Shredded paper inside cardboard rolls
- Coconut shells filled with dry food for foraging
- Hanging sisal ropes with wood blocks
Rotate toys weekly. Always check for fraying threads or sharp edges.
8. Lighting and Environmental Control
Parrots benefit from natural light, but direct sun exposure in summer can lead to overheating.
Lighting notes:
- Place the cage near a window, but provide a shaded section.
- Avoid full exposure to drafts or cold wind.
- If indoors full-time, install full-spectrum UVB lights for vitamin D synthesis.
Cover the cage at night with a breathable fabric to mimic natural darkness.
9. Cleanliness and Hygiene Are Ongoing
A clean cage reduces stress, prevents illness, and keeps the home environment pleasant.
Cleaning schedule:
- Daily: Remove waste tray lining, replace food and water
- Weekly: Scrub perches, wipe bars, rotate toys
- Monthly: Deep clean entire structure with bird-safe disinfectant
Use newspaper or recycled paper in the tray—avoid sand or wood shavings.
10. Consider a Modular Design for Upgrades
If you build in sections, it’s easier to expand. Modular cages let you add breeding boxes, nesting areas, or outdoor flight extensions.
Ideas for future-proofing:
- Use bolt-together panels instead of permanent glue
- Label each section to make reassembly easier
- Add extra mesh panels in storage for future use
A DIY parrot cage setup doesn’t require exotic materials or engineering skills. What matters is thoughtful planning, safe material selection, and regular upkeep. With time and care, you’ll provide a setup that supports your parrot’s health, instincts, and happiness—on your terms.